Beginner's Guide to Perler Beads
Table of Contents
Beads
Introduction to fuse beads
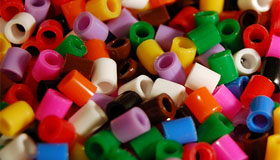
Perler beads (also known as Hama or Nabbi beads) are small plastic beads that fuse together when heated. Crafters arrange these colorful beads on plastic pegboards to create patterns, then use a clothes iron to permanently bond them together. Beyond flat designs, the beads can be made into jewelry, keychains, or three-dimensional decorations.
This affordable craft encourages creativity while helping young children develop hand-eye coordination, color recognition, and basic counting skills. Fuse bead crafting offers an accessible way to combine artistic expression with hands-on learning.
Bead brands
Perler dominates the US market while Hama leads internationally. These brands are fully compatible since their Midi beads share identical size and material specifications. Avoid mixing them with cheap generic alternatives from discount retailers, as these don't melt consistently and can ruin projects.
Bead materials
Fuse beads are made from low-density polyethylene (LDPE), a safe, food-grade plastic free of harmful chemicals.
Bead sizes
The standard 5mm diameter beads work well for all ages. For toddlers around three years old, larger 10mm options are available: Biggie Beads (Perler), Maxi Beads (Hama), or Jumbo Beads (Nabbi). Hama also produces 2.5mm Mini Beads, though these remain far less popular than the standard size.
Bead colors
Perler beads are available in solid colors, translucent finishes, glitter effects, and glow-in-the-dark options.
Beginners should start with a small sorted assortment like the
Perler Tray of 4000 Beads to explore the craft before investing in additional colors.
Your bead inventory needs depend on your chosen designs, but
black
beads (for outlines and shading) and
white
beads (for highlights and backgrounds) are consistently high-demand colors.
Skip specialty beads like glitter and glow-in-the-dark varieties initially as they have limited practical use.
While
mixed-color jars
offer lower unit costs and variety, they require tedious sorting before use.
Pre-sorted options save significant time and effort, especially for beginners.
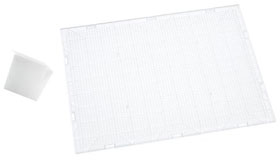
Pegboards
Pegboards come in various geometric shapes, but
interlinkable transparent square boards
with 29-by-29 pegs (841 total) offer the best versatility and value.
For large designs, consider investing in
superpegboards
that accommodate 3,381 beads.
Avoid smaller or irregularly-shaped boards initially.
While useful for specific projects, they're less adaptable than standard squares.

Ironing
Ironing paper
Always use ironing paper to protect your iron when fusing beads.
Both
parchment paper
and
wax paper
work effectively and can be reused multiple times.
Check your bead kit first.
Many packages
already include ironing paper, so separate purchases may be unnecessary.
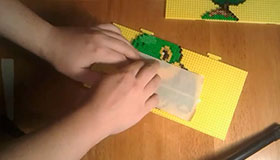
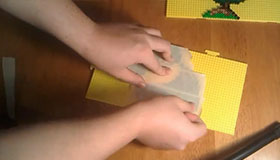
Basic ironing technique
Work on a flat surface and preheat a dry household iron to medium or high heat. Never add water, as steam will ruin the beads. Cover your completed design with ironing paper and move the iron in slow, circular motions for about 30 seconds, applying gentle pressure. Start by ironing edge beads first, as they're most likely to tip over before fusing.
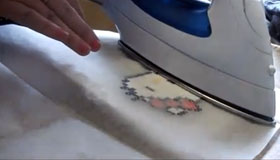
If beads fall off, immediately set the iron aside and use tweezers or a toothpick to reposition them on the pegs. After ironing one side, place heavy books on top of the ironing paper to prevent warping as the beads cool. Wait about a minute, then carefully peel off the paper and flip the fused piece. Cover the other side with fresh ironing paper and iron evenly. Don't worry if your first attempts result in overheated beads or uneven surfaces. Practice with small designs to develop your technique before tackling larger, more complex projects.
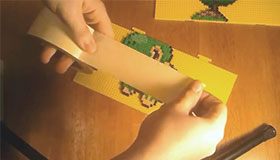
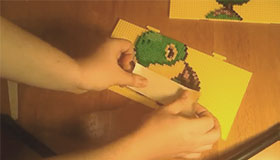
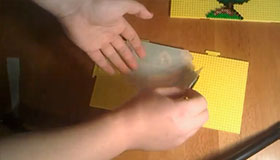
The tape method
Pegboards are plastic, so they may warp under iron heat and pegs can melt down if the iron gets too close.
To prolong the life of your pegboards, use strips of
wide masking tape
to cover the beads so that you can lift them off the pegboard and flip them over.
You can then lay down a sheet of ironing paper and start ironing without running the risk of destroying your pegboards.